Tech

New Products

Random Thoughts

Nostalgia

Borg Warner R-10 / R-11 Tech Tips

Posted on 10/8/15 with No comments
Borg Warner Overdrive Tech Tips

The Borg Warner Overdrive R-10 / R-11 electrical overdrive was first introduced in 1940. Prior to the R-10 / R-11 overdrive there was the R-9 overdrive which was a part mechanical part electric overdrive. In this discussion all of the information I give you here is for the R-10 / R-11 overdrive models. I will explain the difference in the two models in this discussion...so pay attention.   

The Borg Warner overdrive would become an option for 22 different makes and models. Ford was the last to offer the Borg Warner overdrive in 1972 as an option for the Ford F-150 pickup. Ford was also the last one to offer it as an option in a car for the 1967 model year. Studebaker sold the most overdrives options. There were over four million Borg Warner overdrive transmissions sold between their introduction and the last ones sold by Ford in 1972. 

1) Their were 11 different wiring diagrams for the Borg Warner overdrive transmission BESIDES the simple one I provide to you in my overdrive book and in the instructions that are included with the overdrive parts you buy from me. I believe simple is good so that is why I include the original Borg Warner wiring instructions. They are the simplest and least complicated to understand. 

2) The Difference.  The R-10 and the R-11 overdrive models are exactly the same with one exception, the difference is the number of gears inside of the sun gear. An R-10 had three gears while the R-11 had four. The R-11 was used on heavier cars, most typically Packard's and in later years, in higher horsepower V8 applications. The R-10 is by far the most common  and will be plenty strong enough for most antique vehicle applications.

3) Model Identification You can look on the transmission housing next to where the solenoid goes into the transmission and there will be some raised casting numbers cast into the housing. It will say R-10 followed by the transmission identification number which also tells you the application of the transmission. If your transmission is an R-11 it will say R-11 followed by the identification numbers of the transmission. 

4) All of the electrical...Relay, Solenoid, Kick down switch, and most all of the internal parts will interchange between the transmissions. In other words a Ford solenoid and a Studebaker solenoid will interchange with a Willy's or a Hudson. Keep that in mind when you go to the next swap meet.

5) Solenoid Shaft Lengths...MOST but not all shaft lengths of overdrive solenoids measure about one inch in length, if you lay a ruler on top of the shaft and slide it back to the housing of the solenoid. There are a few exceptions...most notably station wagons and convertibles of which some had an inch and a half long shaft due to an extra cross member being present on the frame. Also some Chevrolet pickups from the mid to late 1960's had a two inch long shaft. There were only about 1500 of those made which is good and bad. Good because your odds of ending up with one is slim. Bad because if you end up with one you odds of finding another is not good.

6) Things that wear the most. The two most common things that wear out on a Borg Warner overdrive transmission are the Relay and the Solenoid, which makes sense as they are used the most. A 6-volt and a 12-volt solenoid and relay will not interchange so you need to buy the one that matches you electrical system voltage. Kick down switches are the next most common wear item and they WILL work on either 6-volts or 12-volts. Governors seldom go bad and seldom need replacing, and will work on either 6-volt or 12-volt applications. 


7) Solenoid wiring terminals...with the solenoid in your hand with the shaft facing out in front of you...the right hand terminal is number four and connects to the relay. The left hand terminal connects to the kick down switch. A small amount of solenoids had a third wire that was a ground if yours is one of those check your shop manual and it will confirm where the third wire goes. Finally...most solenoids had screw in terminals, a few had internal connections with wires coming out of the solenoid. Wiring connections for both are the same.

8) There were two solenoid manufacturing companies, besides Borg Warner, both Autolite and Delco manufactured solenoids. All will interchange and as long as the shaft length matches yours and the operating voltage is the same.

9) Checking Solenoids...The best way to test a solenoid is to apply battery power directly to the number four terminal and ground the case. As soon as you touch the case with the ground, the solenoid shaft should snap out. You can do this while the solenoid is in the vehicle OR while on the bench. Either way should make the solenoid work.

10) Solenoid Installation...This is the most important tech tip of all so play close attention! The first thing you need to do is replace the seal in the transmission housing. That way you won't have any transmission oil leaking into the solenoid and ruining the solenoid.

When you get ready to install the solenoid the first thing you want to do is line up the solenoid shaft so the flat spot is at the 12 o'clock position. Next apply battery power to the number (4) terminal on the solenoid. Then ground the case of the solenoid which will make the solenoid shaft extend out. Now carefully slide the solenoid shaft past the seal  (a little white grease or Vaseline in the center of the seal and on the end of the solenoid shaft works wonders) until the shaft engages into the pawl in the transmission. Once it is engaged turn the solenoid to secure the pawl into the grove of the solenoid. Release the ground and the solenoid shaft should retract... and if you got the pawl into the groove at the end of the solenoid shaft correctly the solenoid itself will be pulled towards the transmission. If you always install your solenoid this way you can be 100 percent sure the solenoid is installed correctly. Line up your bolt holes and you are done.

This method also works if the flat spot on the solenoid shaft is clocked at a different location than the original. The rule is you always want the flat spot on the shaft to be at 
12 'clock position when you insert the shaft into the transmission. Once the pawl is in the groove rotate the solenoid as necessary to line up the mounting holes.

11) Overdrive Lockout Cable. Remember when the cable is pushed in towards the dash, the car will go into overdrive at about 33 mph. If the cable is pulled all the way out away from the dash, the overdrive is "locked out" and the transmission will not go into overdrive at 33 mph. If you are having trouble with overdrive engagement check the cable at the transmission to be sure the shift lever is being moved all the way back towards the rear of the transmission. Kinks in the cable can reduce the travel at the transmission shift lever causing the transmission to not engage properly.

12) Don't Cheat !! It is tempting to connect the solenoid to a toggle switch and by-pass the relay, governor, and kick down switch. If you do that you have to remember to NEVER start out in first gear or reverse in overdrive or you will crush all of the needle bearings in the sun gear. That will be really expensive. You will know when you do it because of the sound it makes but by then it is too late. You are looking at a $400 to $600 repair bill if you can find the parts which will have to come from another overdrive transmission because there are no new parts available.

I have had dozens of customers over the years say "I can remember" or "I put a light on the dash..." or any other of a dozen excuses. Eventually they all forget and have the repair bill to prove it!

14) What About Gear Oil?  You want to use GL-1 gear oil in your overdrive transmission and in the front transmission. When you buy a gallon of gear oil you will have about a pint left over after you fill both transmissions. depending on how much you spill on the floor filling the transmission. There is a passageway between the two transmissions but you must fill BOTH transmissions. Do not use tractor oil or any GL rated oil higher than GL-1 as the detergents in the modern gear oils will attack the bronze bushings and parts in the overdrive. And most important of all DO NOT use synthetic gear oil. It is two slippery and the sun gear will not engage. You will have to disassemble the transmission and get all of the synthetic residue off of the internal parts. That is not a fun task!

If you want to learn more about the Borg Warner Overdrive order my Overdrive Book available in the "parts" section of the website. It will be money well spent.
READ MORE

The 1939 Chevy Krazy Kar

Posted on 10/6/15 with No comments
The Krazy Kar built by Henry and Wilfred Abels of Clay Center Kansas  in 1960

It was the Thanksgiving dinner of 1959. While most of the Thanksgiving dinner table conversation revolved around how the children and grandchildren were doing, two brothers Henry and Wilfred Abels had their own private conversation going on.  The Kansas State Centennial celebration was coming up in 1961 and they decided they should build something for the occasion.

Henry remembered he has an old 1939 Chevrolet car parked out behind his barn. The brothers decide to use that car, find another one like it and build a car with two front ends welded together that would steer from both ends. It would take a little more than the usual “farm” engineering they were used to, but the brothers were always up for a challenge.

So in their spare time they got to work. They started by taking the body off of the 39 Chevrolet car chassis. The next job was to locate a front end that was the same width as the stock Chevrolet car front end that also steered. In 1959 the choices were limited.

After a few Saturdays spent visiting all of the local salvage yards in a 100-mile radius, they determined that a Dodge Power Wagon front end was within a couple inches of being the exact same width. That would be close enough.

Because this was a low budget “fun” project the rest of the car was built using what they already had on the farm. That included replacing the bad sections of the original wiring harness with the wiring they had saved from tearing down old houses and barns.

With the Dodge Power Wagon front end installed onto the 1939 Chevrolet car chassis it was time to build the body. Turns out that 1939 Chevy cars were not an easy find locally in 1960. They found lots of 1937 models and lots of 1935 models but no 1939’s. After three months of intense searching they finally located what they needed in a salvage yard in Manhattan Kansas.

They had to shorten the bodies of both cars quite a bit more than they originally planned, in order to get both front ends to fit onto the stock length frame. With the bodies mounted and welded together it was time to build the doors. They ruined two complete sets of doors trying to figure out how to cut and section them to fit the openings. No matter what they tried nothing worked.

Most people would have scraped the whole project about then. Not these two! Finally after three weeks of working with door number five… they figured it out, then, all they had left to do was build a second door for the other side.

They used the stock outside door hinges and pins on one end of the doors and a large bent gutter nail for the door pin on the opposite end of the doors using the original outside hinges.  They used old movie theatre seat cushions mounted on wooden box frames for the seats. They went to great pains to be sure the interior was the same inside for both ends.

Matching the steering columns, meant matching steering wheels, and same 3-speed shifters and making sure all of the linkages and pedals on the floorboards, were present and working on both ends. Matching the Dodge Power Wagon front-end to the 1939 Chevrolet Steering box turned out to be one of their biggest challenges.

When it was completed in 1960 there were eleven horns on the car. Today the car still has seven horns including the original mechanical Bull Horn.

The brothers took the “Krazy Kar” to the 1961 Kansas State fair where it was a big hit. The car then appeared weekly at dozens of county fairs and parades throughout the state for the next dozen years. In 1973 the brothers decided the Krazy Kar had “made the rounds” so into the barn it went where it remained for the next 39 years. 

I grew up and went to High School with Benny Gibbs the grandson of Henry Abels. One January day in 2007 I got to thinking about the Krazy Kar and wondered what happened to it. I called Benny who explained after the grandparents died the car was gifted to Wilfred's oldest son Barry who lived in Denver. After Barry died it was gifted to Benny who by now was living in Austin Texas. Benny went to Denver and got the car and hauled it to Austin where he put it into storage.

 I tried to convince Benny to fix it up or I would buy it if it was for sale. He did not have much time to fix it up, he was plenty busy at work. Benny said he could not sell the car as it was a family heirloom. Not willing to give up so easy I called on Benny's younger brother Kenton who lived in Arkansas City Kansas and convinced him to ask Benny if he could come get the Krazy Kar so we could get it running. Benny happily agreed. 

Kenton was to young to ever drive the Krazy Kar it but had fond memories of it. Benny and I did get to drive it a few times around the farm when we were in High School with strict orders not to wreck it. That was in the early 70's after the newness had worn off. 

Kenton went and got the Krazy Kar and it took most of the winter to get it running. New tires a little work on the brakes and a paint job later it looked better than it ever did. Ironically, Kenton was about the same age when he started working on the Krazy Kar as his granddad and his uncle were, when they started building it.

Its first trip out after its long hibernation was in the annual Piotique Parade in Clay Center. The car had not seen the light of day in 40 years. It was the Clay Center Piotique Parade in the fall of 1960 where the car was first driven...." to test it to be sure everything worked..." Kenton and I did the exact same thing 40 years later. Who would have thought? 

Kenton and I have driven The Krazy Kar in about a dozen parades and it is a lot of fun to drive. Communication is of the essence or you will end up on the curb before you know it. We practice for about 20 minutes before every parade so we can check the width of the streets and intersections...normally if the streets are wide enough we do complete circles at intersections and crab walk down the streets. It is a handful making sure you do the opposite of what the other driver says he is going to do and watch out for kids at the same time. 

In the updated version the Krazy Kar got an actual spray paint job instead of the brush paint job it had originally. Everything else is true to the original design with no other changes made. The only addition was a 1961 Kansas Centennial License tag installed on the front the car. The goal was to capture the nostalgia and experience what it was like to drive the car when it was first built. Today we can do that. Henry and Wilfred would be proud.


The Krazy Kar As It Looks Today. 


The Blue End Is The Dummy End


The Red End Has the Engine And Transmission


This Is The Drivers Side


This Is Also The Drivers Side


 The Dodge Power Wagon Rear End That Drives The Car. 

UPDATE  - 
The Krazy Kar appeared in the 2017 Clay Center Piotique Parade for only the third time since it was revived in 2008. The original 1939 generator breathed its last during its last parade appearance two years ago. Time for an upgrade to a Fifth Avenue 6-Volt Alternator. Boy did that make a difference. Better starting especially when the engine was warm and while we sat for 20 minutes getting lined up in the parade the battery stayed up for the first time ever.

It also got a gear driven electric fuel pump to help out the tired mechanical pump. That combined with one-gauge replacement battery cables made a huge difference in the cranking power of the car. it was an obvious upgrade to me but the family had to weigh the decision of changing the car from the way it was originally built. In the end they decided that if the two brothers had known of these upgrades, they would have used them.

None of the changes are permanent, everything is bolt on and can be put back at any time. We have had to push start the Krazy Kar in the past and we always knew better than to shut it off at the end of a parade, unless we could park on a hill. I had been campaigning for these upgrades for a while. Finally it was time.

Now the car is much more fun to drive. We had a film crew from Wichita KS. come to Clay Center for the friday night cruise night and yes we drove the Krazy Kar in cruise night. It was a first drive in the dark. Doing the circles in the street and watching the headlights shine off the buildings is kind of an erie sight. We had no idea we were being filmed until the next day at the car show, they tracked us down for an interview and a demonstration. We even put the camera man on the running board and he filmed us doing circles... figure 8's... and crab walking. He said that was a first in all his years filming car shows. Guess he has never hung around us Krazy Kar drivers before.


READ MORE

Who is Randy Rundle and what is his connection to this 1936 Cord?

Posted on 10/4/15 with No comments
First a little introduction is in order here...

My name is Randy Rundle. I am the owner and janitor on Saturday at Fifth Avenue Antique Auto Parts located in Clay Center Kansas. While Clay Center is not very big (4,500 happy souls) Fifth Avenue does business with customers literally all around the world. We currently have customers in all of the fifty states (lots of 'em) and customers in all of the Providences of Canada and an additional 19 foreign countries. Here is a little history of how Fifth Avenue Antique Auto Parts got started...

I bought, fixed up, and sold dozens of the 1948 thru 1954 Chevy and GMC trucks when I was in High School. I learned first hand about the hard starting, yellowish dim headlights, and the dead batteries. I camped out on the doorstep of all of the local mechanics asking for help with my old trucks. I got lots of ideas  from 8-volt batteries, to "just turn the regulator up..."   " to put a smaller pulley on the generator.."... and about a dozen more, none of which solved the problem... just treated the symptoms. 

Then it occurred to me that if I was having problems so was everyone else and I am just the guy who should fix this problem.

When you are young nothing is impossible...at least in your mind. I assumed (you all know the meaning of that word ) that the solution was to take modern technology and apply it backwards and build a 6-volt alternator. That should be a piece of cake and I wondered why somebody else had not already done it. I soon found out it was way more difficult and expensive than I could have imagined. When I asked for help from the electrical engineer types they all laughed at my idea..."everybody KNOWS you don't apply modern technology in reverse. Don't waste your time...and ours!! "

I admit to having a stubborn streak and so I ignored their advice and sat out to prove them wrong. Two years and a pile of destroyed parts out the back door later I had a working 6-volt alternator. I put it on my 1951 Chevy half-ton pickup (it is still there by the way) and drove it for a year.  The locals who had been tuned in to this adventure all came up to me and said, "We see you finally gave up on that stupid 6-volt alternator idea and converted your truck to 12-volts. .." We know its 12-volt 'cause your lights are bright and we heard your truck start up at the gas station..."

After a year of driving my truck around with the 6-volt alternator installed I began selling the 6-volt alternators locally mainly to farmers who had old trucks and tractors around that they did not use much, but wanted them to start when they needed them. The alternators proved themselves and I knew my hard work had paid off. The year is 1985.

I knew if I was going to make a living selling alternators I needed to sell them nationwide. But...I had spent all of my money figuring out how to build the alternators and had no money left for advertising! Got to come up with a plan, and soon!

One day I happened to read about this race in Texas where pre-1942 cars were being driven 3200 miles across the United States in three weeks time. I decided that was my new marketing campaign. If i could get one of those Great Racers to put one of my alternators on his car and enter the race. I would have proof that my alternator worked!

So I began knocking on garage doors offering a free 6-volt alternator to the first Great Race Team who would put one on their car and give me an endorsement at the end of the race as a testimonial that the alternator did indeed work and do what I claimed it would. Lots of " maybe next year" to some flat out no's. There were 100 entrants so I figured somebody should buy into the concept. Finally after a month of knocking on garage doors, I got lucky.

Bud Melby, of Seattle Washington agreed to put my alternator on his 1936 Cord. "Oh Great I say to myself, I know nothing about a Cord Automobile. Why couldn't my first Great Race car be a Ford or a Chevy something I had experience with? I soon learned that a Cord is all electric shift controlled by a series of levers on the steering column, and that Bud had added an overdrive to the transmission that was also controlled by an electric solenoid.

I also learned that the stock generator was not providing enough current to keep the battery fully charged and the lights were always dim. Bud said they had to put a fresh battery in the car at noon each day of the Great Race in order to be able to shift gears in the car. He was ready to try most anything. I could tell by the tone of his voice he had not completely bought into this 6-volt alternator idea, but was at least willing to give it a try.

So for the 1989 Great Race, Bud Melby was the first to use my 6-volt alternator. It worked perfectly, much to the amazement of the other Great Race teams who like Bud had never even heard of a 6-volt alternator till I came along. Today my 6-volt alternators are quite popular with Great Race entrants who are aware firsthand of their proven reliability.  I now offer 44 different products to make all types of antiques vehicles more reliable and fun to drive. Many of those products came about as a result of preparing cars entered into the Great Race. I have learned a lot from preparing Great Race cars for 25 plus years.

Today...I still prepare about a dozen cars for the Great Race every year and what I have learned in the past 25 plus years can be applied to all types of antique vehicles to make them more reliable and fun to drive.

I enjoy what I do, and you as a customer get the benefit of knowing what you buy from Fifth Avenue has been proven to work by being tested first on the Great Race.  Many will tell you we are not the cheapest but we are the best. You deserve to have an antique vehicle that is just as reliable as one entered in the Great Race. 

My goal is to update this blog on a weekly basis. Some weeks you may get more, some weeks less depending on my schedule. You will learn all sorts of things from this blog, some technical, some history, some nostalgia, and some just fun stuff. I do my best to keep the typos out but if you find one you can keep it...finders keepers as the saying goes. So until next time...Randy


       Bud Melby's 1936 Cord ready for the 1989 Great Race


READ MORE

Now You Can Check The Percentage Of Alcohol In The Fuel You Buy In Ten Minutes Or Less!

Posted on 10/1/15 with No comments
Alcohol In Gasoline – Short Term Effects

As antique vehicle owners we experience first-hand the problems associated with the modern alcohol fuels. Vapor lock, stalling, poor acceleration, and hard starting (caused by the fuel evaporating in the fuel line before the mechanical fuel pump), are all symptoms we are familiar with. The alcohol is also an aggressive solvent that will loosen varnish and gum deposits in the gas tank and fuel system. That will in turn plug fuel filters, and affect the operation of the idle jet, needle and seat, and float in the carburetor.

Alcohol In Gasoline – Long Term Effects

When antique vehicles are placed in long-term storage (6 months or more for example) the alcohol in the gasoline will draw moisture (up to a gallon a year) from humidity and temperature changes, and thru places like the vented fuel cap.

In as little as sixty days the alcohol will begin to separate from the gasoline and the newly formed mixture of alcohol and water will settle in the bottom of the fuel tank where it begins to loosen the rust and corrosion on the inside of the tank. The mixture will also attack welded seams and any thin places in the tank (corners) eventually causing the tank to begin leaking fuel. (The alcohol can also damage rubber fuel lines from the inside out, Which is why you need to replace your rubber fuel line with the new barrier fuel hose.)

If the pickup tube of your gas tank is in the bottom of the tank as most antique vehicles are, you will get the alcohol and water mixture instead of the gasoline when you try and start your car after it has been in long -term storage. Testing the gasoline yourself is the only way you will know for sure, what is in the bottom of your fuel tank.

By the way that accumulation on the bottom of your fuel tank works excellent for plugging up fuel filters, needle and seats in carburetors. It can also keep you antique vehicle from starting or cause it to run poorly. That is because you are trying to burn a mixture of alcohol and water.

For more information on alcohol gasoline and its affects Click and view the following links:
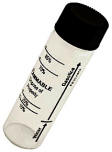
 We offer the Alcohol Fuel Test Kit shown above on our website. Click here for more information.
READ MORE

The Great Race...How It Works

Posted on with No comments
I have been preparing the antique vehicles entered in what is now the Hemmings Great Race since 1989. What I have learned in all of those years can be applied to all types of antique vehicles to make them more reliable and fun to drive. Nobody appreciates a reliable antique vehicle more than a Great Race team. To understand why that matters here is a little insight into how the Great Race works and what the driver and navigator have to do during a typical day. Sit back and prepare to be enlightened.

Most Great Race teams will disassemble their cars starting about the first of August and check / rebuild everything. Engine compression, brakes, steering, electrical, cooling, fuel, clutches, starters transmissions, seals, gaskets, you get the idea. Most will have their engine back in the car no later than mid February, so they can begin to put on the practice miles. Just pulling the engine checking it out, replacing gaskets and minor things can change the character of the car. Most will put on a minimum of 500 practice miles learning consistent stopping, starting, and turning, and learning to work together as a team. And... their will be a few things you will need to add to your car before you can enter the race...such as...


Speedometer

An accurate speedometer that can be calibrated is essential for obtaining good scores. The official speedometer of the Great Race is the Time wise 825 electronic speedometer. Use of any other type of speedometer (other than the car’s stock speedometer) requires the specific approval of Great Race. The Time wise speedometer was specifically developed for Great Race type rallies. This speedometer costs about $1,000. 

The installation of the speedometer basically involves gluing two small magnets to one wheel, fabricating a bracket to hold the electronic pickup, mounting the speedometer for viewing by the driver, and connecting to a power source. There is a market for used speedometers and they can often be sold for a few hundred below the purchase price if you do not plan to do further rallies.

   This is an example of the speedo you will need to use when you enter a vintage car rally.

Calibrate Your Speedo and Clocks Daily
                                                                                                    
After installation of the speedometer, calibrate the speedometer in accordance with the speedometer instructions. During the race you will also have an opportunity daily to calibrate your speedometer on a specific course to make sure your speedometer agrees with the instruments used to construct the Course Instructions. The picture shows a Time wise speedometer installed in a 1936 Packard.

Analog Clock

You should have an analog clock mounted on the dash or on the lapboard. This can be an inexpensive “Wal-Mart” type clock. Many competitors use a Sawtooth Rally Clock. This clock is the correct size, has a continuous motion, has minimal backlash on the hands and every second is numbered. The picture below shows a Sawtooth clock mounted on the dash where it can be read by both the navigator and driver. Notice the factory speedometer is covered up completely. Some teams drive by time alone. Your factory odometer has to be covered as per rules the speedometer is optional. By the way your cell phone goes in the trunk and is for emergency use only.


An Analog clock needs to be large enough to be read by both the driver and navigator.

Stopwatch

A good stopwatch is a necessity for accurate rallying. Be sure to get one that has a lap-split function and a time-of-day function. Most navigators wear their stopwatch on a lanyard around their neck but it is also possible to attach it to your lapboard.

Lapboard

A lapboard is the place to hold the route instructions, pens and pencils, and car calibration charts. Every navigator has their own preference for organizing these materials. There are two basic types of lapboards, flat style and roller style. The roller style scrolls the rally instructions by rolling the instructions. Most teams use the flat style. The following picture illustrates a typical lapboard. Many team navigators make their own.

You will get your course instructions each morning at a minimum of 30 minutes and maybe as long as two hours before you leave or longer depending on what number you draw for a start position. You will want to study the course instructions carefully and highlight with a yellow highlighter marker any tricky instructions (and there are usually a few to try and trip you up if you are not paying attention) so you note and specific instructions.


     A typical Lap board.  Note Speed Calibration Charts.

Car Calibration

In order to have good scores you need to be able to drive your car consistently. This means accelerating the same every time, holding exact speeds, stopping the same every time and making turns the same every time. In addition you need to be able to make adjustments to account for losses and gains during the rally. Calibration charts are the basis for making these adjustments. Consistent driving and good calibration charts go together to achieve good scores.

You may not think that an accurate speedometer is needed, but consider that if your stock speedometer is only off by 1 per cent, your error will be 36 seconds per hour. Most teams, including rookies, will have scores of less than 10 seconds per hour. If you can’t tell the difference between 49 and 50 miles per hour on your stock speedometer, your error will be 2 per cent which amounts to 72 seconds per hour.

Practice Driving

You have decided to enter the Great Race and the guidelines strongly suggest that you should calibrate the performance of your car. Actually, you need to calibrate the car, the navigator,  the driver and the car together. The car and the driver / navigator team need to be calibrated together, so that they can perform in the race the same each day every day,  as they did during the practice calibration.

The Great Race and similar rallies have a basic assumption that makes it challenging. This assumption is that a car can stop instantaneously and accelerate to speed instantaneously. Of course, your car cannot do this. Accordingly you will lose time on many of the maneuvers in the Course Instructions. These losses will add up to very large time errors and resulting poor scores. By calibrating your car you will know the size of these losses as they occur and can make corrections.

There are several methods for doing this calibration. What follows is a relatively simple way for rookies. This method will calibrate your car, give the driver experience in consistent driving, and give the navigator experience using the stop watch. The numbers used as examples are purely for illustration and do not reflect the actual performance of a particular car.

First, you will need a location to do your calibrations. The location should have a straight section of road about a half mile long with little or no traffic. You will also need a way to turn around near each end of the course. You may be able to find a little used road out in the country or maybe in a very large mall parking lot. You will be traversing this course at different speeds ranging from 15 to 50 mph and making frequent stops.

The exact length of the course is not important since you will be making time comparisons for different runs. A course that takes about 40 seconds to traverse at 50 mph is about right. Mark each end of the course with a visible marker. An orange traffic cone or a stick with a flag will work. You may want to use a shorter course for the lower speed runs to save time.

Run the course at speeds of 15, 20, 25, 30, 35, 40, 45 and 50 mph. Make at least 4 runs at each speed and record the times. Run the course in both directions. You need at least 4 runs to get a good average time. If you have a lot of variation, make more runs. You need to be as consistent on every run as possible in order to chart exact time and speeds.

At the start of a timed section of the race, the Course Instructions might say to accelerate from a stop to 40 mph. From your practise time you will know that accelerating from 0 to 40 mph results in a net time lost of 4.5 seconds. You have two options to correct for this time lost. One is to start 4.5 seconds before the instructed time. The other is to make up for the lost time after starting at the instructed time.

Stop and Go Pause Times

The Course Instructions for stop signs usually say to stop at the sign, pause for 15 seconds, and proceed at the assigned speed. Since the race cars cannot decelerate and accelerate instantaneously as assumed by the Course Instructions, you can make up for the deceleration and acceleration errors by changing the 15 second pause time to a lesser amount depending on the speeds involved. Note: Always check the course instructions carefully since sometimes the instructed pause time may be different than 15 seconds.

To use the chart simply begin with the “IN” speed on the left of the chart and move to the “OUT” speed across the top to find the new pause time. For instance, if you are doing 30 mph before a stop sign and will leave the stop sign at 40 mph, the pause time would be 8.6 seconds rather than the instructed 15 seconds. By changing the pause time there is no need to make up time for the deceleration and acceleration losses. However, if you have to wait for traffic longer than your planned pause time, you will need to make up the difference between your planned and actual pause times.

How to Make Up Lost Time

Let’s use the example of a 40 – 35 turn. After leaving the turn you need to make up 4 seconds. The easy way is to use the “ten per cent rule”. Simply drive 10 per cent above the instructed speed for 10 times the seconds needed to be made up. So for this example, drive 38.5 mph (10 per cent faster than 35 mph) for 40 seconds (10 times the 4 seconds lost) and then return to the specified speed of 35 mph and you will be back on time.

Another example would be an additional delay due to traffic at a stop sign. If your pause time for a 30 – 40 stop is 8.6 seconds (see Stop & Go chart above) and you actually pause for 13 seconds due to traffic, you need to make up 4.4 seconds. To do this, drive 44 mph (10 per cent above 40) for 44 seconds (10 times 4.4 seconds).

This method works the same way for losing time. To lose time, drive 10 per cent below the instructed speed for 10 times the seconds needed to be lost.

Another useful formula is used for making up time when you drive slower than the specified speed due to traffic or other conditions. Simply divide the difference between your actual speed and the assigned speed by the specified speed and multiply by the time driven at the reduced speed. This will result in the number of seconds lost.

As an example, lets say you catch up with traffic and have to slow from the specified speed of 40 mph to 30 mph for 20 seconds. Your lost time would be 10 divided by 40 times 20 which equal 5 seconds.

Speedometer Calibration

After completion of the speedometer calibration run which will be the first instruction of the day... your clock time might show an actual time of 28 min 47.3s compared to the correct time of 28 min 43.2s. This is an error of 4.1 seconds late. You will need to figure this correction into every instruction you complete throughout the day.

And it will likely be different tomorrow. Everyday is different which is why it is a daily task. Things like air pressure, tire wear will change daily due to temperature and related. Natural rubber tires grow in diameter when they get warm which will change the diameter of the tire and in turn the calibration readings. On a 95 degree day the tire will be a different diameter than it will on the same day when driving thru the rain and the temperature at 60 degrees.

Stop Signs

Stop signs are straight forward. Pull up to the stop sign, pause for the time indicated in your performance chart and then depart at the indicated speed. Since the pause time in your performance chart takes into account the losses for braking and acceleration, there is no loss or gain to be made up after the stop sign. However, if there is traffic and you leave sooner or later than your pause time, the difference will have to be made up using the 10% rule. Don't forget your speedometer correction. 


Turns

At a turn, slow to the speed your performance chart is based on, make the turn and accelerate to the indicated speed. From your performance chart you will find the loss for a particular turn. Now you know why you had to practice driving at all of those different speeds. Use the 10% rule to make up this time as soon as practical after the corner.


Speed Changes

You instructions may say to change your speed from 35 to 30 at a “SPEED LIMIT 35” sign. The best way to do this maneuver is to split the speed change at the sign. Decrease your speed just before the sign, cross the sign at 32.5 mph and continue slowing down until you reach 30 mph. This gain and loss cancel each other and you are back on the correct time.


Checkpoints...

Typically there will be between 6 and 8 hidden checkpoints along the route each day. They typically are hidden just over the crest of a hill or at the bottom of a blind corner, anyplace that you are likely to be off time. There are no set rules, the checkpoints may be 60 miles apart or ten miles apart. You will not know where they are until you see them...and they see you! Being early to arrive at a checkpoint is just as bad as arriving late to a checkpoint. This is a mental challenge. Sometimes your mind knows what to do but your body will not cooperate. It is easy to get flustered and then things go down hill fast.

Summary....

So by now you you have some idea what the Great Racers do on a daily basis. It also become painfully apparent that a reliable car is a must. Keep in mind besides the time loss the racers can have no outside help to fix their cars if they have a breakdown. As a result they practice a lot including changing flat tires which they can change in 8 to 11 minutes on average. To do it that fast takes practice and they have to each know what the other person is going to do. You have to also have the proper tools along and remember to not leave them beside the road when you are done.

When you are done with your flat tire repair and are back on the road... you will have to makeup the time you spent changing the flat tire so you will need to keep track of the time you spent fixing that flat tire then figure that correction into your course instructions along with your tire calibration instructions. Does your head hurt yet...?

So there is a lot going on behind the wheel of a Great Race car. You also need to keep in mind that the older the car the bigger the scoring handicap but the more work it is to keep the older cars on time. Keep in mind that you will be doing this for about 7 days straight. Most cars do not have power steering or air conditioning and some have no top like the 1911 Velie or the 1916 Hudson that I sponsor every year.

If you are thinking about entering the Great Race you should go visit the race at one of the overnight stops. You can talk to the drivers and navigators first hand. They are all very user friendly and will gladly answer any questions you have. You can also go to the hotel and watch them work in the parking lot preparing their cars for the next day.

Next up you need to go to the Great Race website and download a copy of the rookie handbook. From there you can watch some of the videos on scoring, and most every other subject related to the race. Watch the highlights of this and previous years races and get involved it truly is the adventure of a lifetime.

Picture credits and sample speed charts sourced from Great Race.com. If you are interested in more details and want to get involved in the Great Race go to their website watch the videos and download a copy of the rookie manual. That will get you off to a good start.

Then there is the VCRA...

Rex Gardner the founder of the Vintage Car Rally Association is a long time Great Race rally participant. All of his events are very user friendly and everyone involved will help you get started and answer any questions you may have. Rex's rally is one I would recommend if you wan to get started in vintage car rallying. There is no better place to learn. His rally works just like most all vintage car rallies so you will need the same equipment, follow the same basic rules, and will need the same basic car and mental preparation.

The one major difference in a VCRA rally compared to The Great Race is the VCRA Rally uses a cloverleaf format (you travel a different direction every day but return to the same starting point) to reduce costs and to make the Rally a more family oriented atmosphere. The Great Race travels to a different overnight stop every day. There is the added expense of moving support vehicles and equipment, along with checking in and out of hotels etc.

On the technical side the VCRA uses a more equitable handicap scoring system, to make it simpler to understand. The VCRA also has a smaller entry fee / and a expanded class structure, which makes for more class winners, and a better payout program. In summary the VCRA is a good way to experience what it is like to be a part of the Great Race without the greater expense. Participating in the VCRA will give you a good insight into how a vintage car rally works.

The VCRA Rally is held each spring in the Springfield Missouri area and is an excellent way to get involved in vintage car rallying.  You can go to http://www.vintagecarrally.com for more details.

If you get the chance you should go and visit an overnight stop
at either a Great Race or VCRA event. Even if you go as just a spectator, you now have a good understanding of how a vintage car rally works. You will also have more appreciation for the job the driver and navigator does each day. The odds that the teams in the great race will be driving a antique vehicle the same make and model that you own is also pretty good. Many of the Great Race entrants today were first spectators. You could be next!


READ MORE

Modern Gas and Oil and Your Antique Vehicle...

Posted on with No comments


I have been been preparing antique vehicles for what is now the Hemmings Great Race since 1989. In this 60 - page book I explain how the changes to modern gasoline and engine oil have affected antique vehicles, and what you need to do to protect your antique vehicle from these changes. A must have book for all antique vehicle owners. I wrote this book to help you understand what has happened to modern gasoline and why you are experiencing things like vapor lock, poor engine performance, shrinking carburetor gaskets caused by the alcohol in the new gasoline.

You also need to understand that the modern engine oils have the zinc removed. Zinc was a part of engine oil since the 1930's and was part of an anti-wear additive package that protected internal engine parts like the surface where the bottom of the engine tappet rides on the camshaft lobe. Modern engines use roller tappets and hardened cam shafts so wear in this location is not as issue like it is with all flat tappet cam shaft engines.  Flat tappet engines still need the zinc anti-wear additive package.

The zinc anti-wear additive package was removed from engine oil because part of the chemicals in the additive package was damaging modern catalytic converters. Bottom line...any engine oil that says "energy conserving" on the label has the zinc additive package removed.. In this book you will learn what the anti-wear additive package was and how you can add it back to modern engine oil to protect the engine in your antique vehicle.

This is only a small part of what you will learn in this book. Order your copy today.
READ MORE

Latest

About Me

My photo
Since 1987, Fifth Avenue owner, Randy Rundle, has been making antique, classic and special interest vehicles more reliable and fun to drive.